Lily Hack Series: Tie Shoulder Straps
Lily Hack Series: Tie Shoulder Straps
Pattern hacking doesn't need to be difficult or take a long time to get a different look. I've already shared my gathered ruffle version of the Lily Cami but today's hack could be the easiest one of them all! It's how to change the shoulder straps to be shoulder tie straps.If you don't own the Sinclair Lily Cami yet, use code Lily4 through June 30, 2019 to get it for $5.99. I like this pattern as my base since it has bust darts and has a great fit for me.

Pattern Hacking
This hack can apply to either the classic or fashion straps and back cut line. Follow the same directions for both. I chose to use the classic back and straps on this one. I find with the classic back I can wear a normal bra and the straps are covered or mostly covered.

The only adjustment's you'll need for this hack is to cut 4 straps rather than 2. I cut them the exact same size as the classic strap pattern piece. Mine are on the shorter side (which is my preference) but you could easily add length to one side of the pattern piece. If you do add length, make sure it is equal on all 4 strap pieces.

Otherwise, cut the remaining front and back bodice pieces like normal. I chose to use a facing rather than the full lining on this Lily.


Otherwise, cut the remaining front and back bodice pieces like normal. I chose to use a facing rather than the full lining on this Lily.

Construction
Next, sew all of your straps right sides together using 1/4" seam allowance and backstitching at the beginning and end. Sew the short end then turn with the needle down and sew the long side, as illustrated by the red line.

Trim the seam allowance down so it's less bulky once the straps are turned. I used my pinking sheers here.


Now turn your straps right side out. Here's a video on how I do that with a bodkin tool.
Once you have your straps turned, press them well. Then place the raw short edges at the top of the main front with the straps facing down. Follow the pattern instructions for attaching the straps and lining or facing. Here's what the front bodice will look like with the straps clipped in place.

Rather than attaching the straps you attached to the front bodice to the back, clip the other set of straps to the back bodice piece. Make sure to pin/clip them in place 5/8" from the side. Baste in place.

Like in construction of the front bodice, lay the lining or facing piece right sides together and clip it in place. Use a 5/8" seam allowance and sew along the curve, straight back and other curve. Trim the seam allowance, press and under stitch like you did with the front bodice.

Open the lining or facing up (shown at the top) on both the front and back bodice pieces. With right sides together, match the side seams and pin/clip making sure the straps aren't going to get caught when you sew up the sides. Sew at a 5/8" seam allowance and finish the seam. At this point, I chose to simply serge the bottom of my facing for finishing. There are other methods in the instructions you could do too.

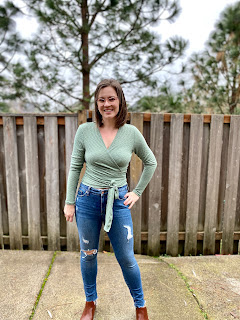
Finish your hem how you prefer. There are several ways in the Lily tutorial. Slide the top on loosely tie one shoulder tie then the other. I find it's easier if someone else can help with this step as it's hard to tie it yourself. My husband preferred the look of a small bow (shown on left) where I preferred a simple knot and longer tails (right).


Fabric Details
This fabric may look familiar. I used it for a Daisy blouse as well and had just enough left for this cami. (Yay for scrap busting!) I love that I can use it as a neutral piece even though it has polka dots. It's the Plum rayon bubble crepe from Mily Mae Fabrics.

The Sinclair Lily Camisole is still available for $5.99 with code Lily4 through the end of June. I have more hacks for the rest of the month too!
My posts may feature affiliate links. This means if you make a purchase from these links, I receive a small percentage in compensation at no cost to you. I may have received patterns or products to test or review but the opinions I voice are my own.

Comments
Post a Comment