How to Make a Dress from a Shirt Pattern
I love wearing dresses and light woven dresses are even better. I was inspired by the Sonny Shirt Dress from Bohme I saw online and wanted to make my own version. This is usually how most of my hacks start. A picture that I just have to recreate. While I love inspirations, I know that they don't need to be exact. This Bohme dress had bust pockets and I didn't see that same vision so I omitted them.
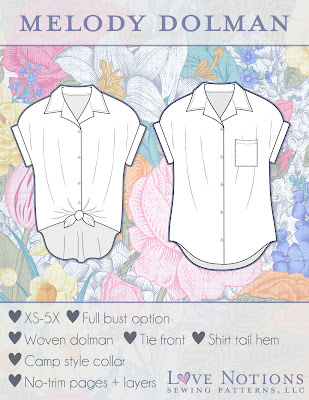
Let's start with the base pattern. The pattern I'm using is the Love Notions Melody Dolman. This pattern is $5 today only as the Featured Friday pattern and was just extended for sizing XS-5X. This is a woven dolman with front buttons. It's designed with enough ease to tie if you'd like or keep it straight. I love the curved hem feature and collar construction. I actually tested this pattern when it first released and have a blog review about it here. Make sure to pick a pattern that you like the bodice fit.
Before you start altering and starting your hack, check your measurements on the size chart of the pattern. Let's take a look at the Melody Dolman, my measurements and what I did.
Since this is a woven pattern, the fabric you will be using doesn't provide additional stretch. My body measurements put me into a size medium. Here's my measurements below:
High Bust: 35"
Full Bust: 36.75"
Waist: 30.5"
Hip: 39.5"
Full Bust: 36.75"
Waist: 30.5"
Hip: 39.5"
The bottom of the chart though shows the finished measurements. I felt comfortable with a bit less ease to make a size small EXCEPT for the hips. Since I'm extending the top to be a dress, I needed to make sure I had enough ease for my hips. My hips are 39.5" and if I made a small at the hips that would only be 42.5" or 3" of ease. That's not enough so I graded the hips to a medium.
Let's Start Hacking
First, decide how much you want to add to the length. I measured the upper shoulder to hem on the pattern piece, then I held a measuring tape up to myself. I figured out the difference plus 1" more to account for hemming and sewing seam allowances. I'm 5'5" and chose to add 11" for my dress length.
The Melody Dolman has a shorten/lengthen line. If you are using paper, slice the paper pattern piece and add the amount you've decided. I used a projector so cut the top bodice to the add/lengthen line. Then I slid my fabric 11" and cut to the hem.
Make sure to add the length to both mirror front pieces and the back piece. You will also want to cut longer interfacing strips so you can extend the buttons as well. If you are wanting to add loops and a waist tie, construct until step for the side seams. Otherwise, you can construct exactly as the directions and have a lovely dress!
Keep in mind, with adding more length to your top (or now a dress) you'll need more buttons or snaps. I extended the snaps but stopped them about 8" from the hemline to allow room for walking.
Adding a Waist Tie and Loops
I decided with the loose dolman style, a waist tie would help define my shape. For the tie, make sure to make it long enough. I cut it 1.5x my waist and that was on the shorter side. I'd recommend 2 x your waist x 2.5". Press the waist tie wrong sides together along the long side. Stitch with a 3/8" seam allowance then turn and press.
For the loops cut two pieces 2" x 5". Press wrong sides together along the long side. Stitch with 3/8" seam allowance then turn and press.
Now lay out your bodice with right sides together. I found since this is a dolman sleeve, my waist was 5" from the sleeve. I placed a clip on each side.
The waist tie defined my waist rather than being a straight more relaxed fit. One key is to not tie it too tight too.
I hope you try making a top into a dress too as it was an easy and successful make for me. If you have any questions, feel free to leave them in the comments or connect on instagram.
My posts may feature affiliate links. This means if you make a purchase from these links, I receive a small percentage in compensation at no cost to you. I may have received patterns or products to test or review but the opinions I voice are my own.


Did you keep the same hem shape as the original shirt pattern? It turned out great. I may have to try this.
ReplyDelete