Calypso Hack Series: Adding Colorblocking to a Men's Tee
It's time for the next installment in the Calypso Hack Series! Previously I've shown how you can combine colorblocking pieces to get a different look. You can combine as many or as few pieces as you like using the tutorial in this blog post. Now I'm switching gears and adding the Calypso colorblocking to a men's t-shirt.
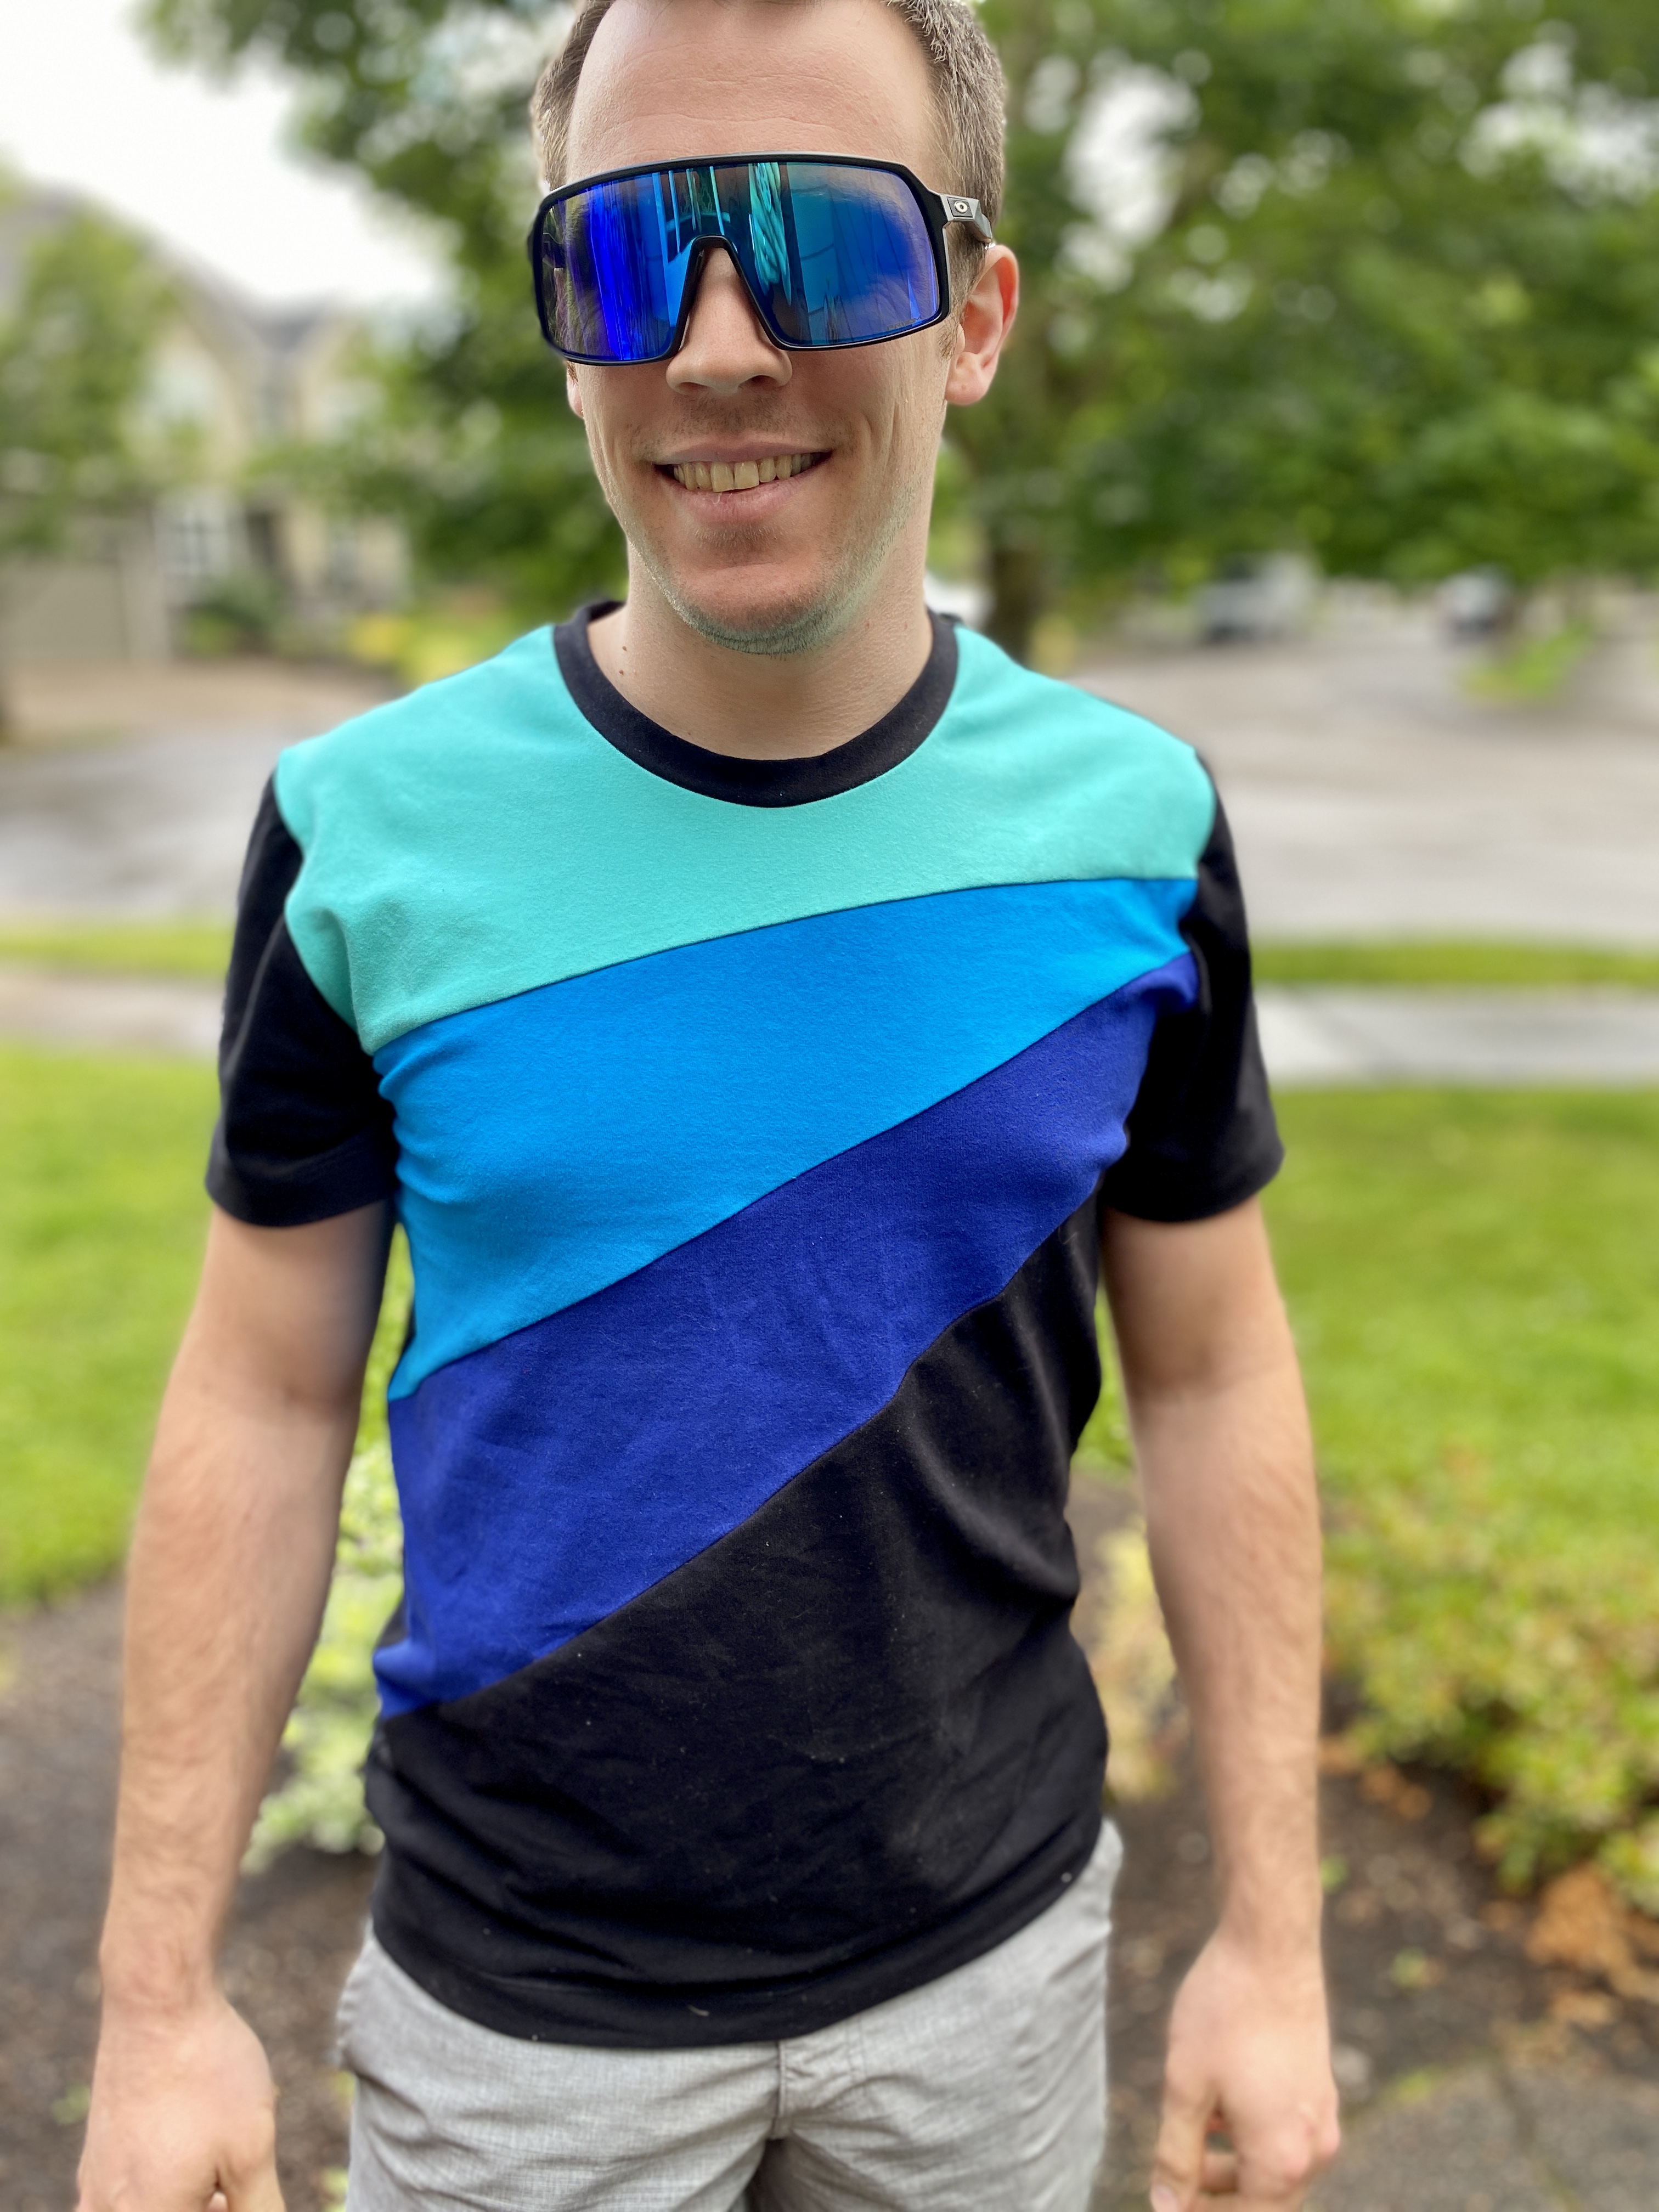
I can't take credit for this idea, my husband gave me this hack design. When he saw my fun spunky Calypso he asked when he'd get one too. I had no response. There was no reason I couldn't make him one too so I set to work. Of course though he had to wear these crazy sunglasses when agreeing to model it. 😂

Hack Details
For this hack you will need a men's in-set sleeve t-shirt pattern and the Calypso pattern. I'm using the Sinclair Kai as the base pattern. To start, the Kai front bodice is cut on the fold. You will need to trace it so you have a full front pattern piece. Grade and make any adjustments you would do normally before starting the hack.

You can use any size of the Calypso pattern pieces but the closer to the men's size the better. I'm using my size 4 Calypso pattern pieces with the Kai Men's US40 pattern. You are using the Calypso pieces as a guide for the angles so it's alright that the pattern pieces don't reach fully from side to side. Lay the Kai or men's shirt on your table then lay the Calypso pattern pieces on top.


The key to this is to use a pencil. I drew my lines and didn't think they were quite right so erased and moved them slightly.

Once you have the lines where you want them, use a brighter pen to trace them. Adding labels and notches to each piece.


At this point you can cut your front bodice apart along the new lines or you can fold it to keep the pattern intact. I prefer to fold but honestly, it's much more difficult to do it this way. Next you'll cut your fabric for each piece ADDING 1/4" SEAM ALLOWANCE along each of the lines you've drawn. On some pieces, you may need to add the seam allowance to multiple sides.
For this Kai tee, I've cut Piece A in teal, Piece B in blue, Piece C in indigo, Piece D in black (and didn't use the side piece) along with the back, sleeves and neckband from the original men's pattern.

Since you added the 1/4" seam allowance, assemble the front according to the Calypso tutorial. You'll do this by matching the fabric right sides together at the notches and sewing/serging. Optionally, topstitch the seams. Once your front bodice is all one piece, switch to following the tutorial for your main men's shirt.


You can use any size of the Calypso pattern pieces but the closer to the men's size the better. I'm using my size 4 Calypso pattern pieces with the Kai Men's US40 pattern. You are using the Calypso pieces as a guide for the angles so it's alright that the pattern pieces don't reach fully from side to side. Lay the Kai or men's shirt on your table then lay the Calypso pattern pieces on top.

Using a clear ruler and pencil, draw lines at the same angle as the pattern pieces. I aligned the bottom pattern piece with the hemline of the men's pattern piece first. Then I placed the top piece, moving it down a bit so it's a bit wider at the front neckline. Pieces B and C need to be spaced out evenly between the other two pieces.

The key to this is to use a pencil. I drew my lines and didn't think they were quite right so erased and moved them slightly.

Once you have the lines where you want them, use a brighter pen to trace them. Adding labels and notches to each piece.


At this point you can cut your front bodice apart along the new lines or you can fold it to keep the pattern intact. I prefer to fold but honestly, it's much more difficult to do it this way. Next you'll cut your fabric for each piece ADDING 1/4" SEAM ALLOWANCE along each of the lines you've drawn. On some pieces, you may need to add the seam allowance to multiple sides.
For this Kai tee, I've cut Piece A in teal, Piece B in blue, Piece C in indigo, Piece D in black (and didn't use the side piece) along with the back, sleeves and neckband from the original men's pattern.

Since you added the 1/4" seam allowance, assemble the front according to the Calypso tutorial. You'll do this by matching the fabric right sides together at the notches and sewing/serging. Optionally, topstitch the seams. Once your front bodice is all one piece, switch to following the tutorial for your main men's shirt.

Fabrics
My husband prefers Cotton Lycra, bamboo and jersey fabrics for tees. This one is made using all Cotton Lycra from Purple Seamstress. I used 3 different shades of blue to create an ombre effect. When making a color blocked top, I prefer to use all of the same or very similar type of fabrics.


Stay tuned for more hacks for the Calypso tee including how to make it into a tank!


My posts may feature affiliate links. This means if you make a purchase from these links, I receive a small percentage in compensation at no cost to you. I may have received patterns or products to test or review but the opinions I voice are my own.


Comments
Post a Comment