Make Nine 2019: DIBY Stevie Jumpsuit
Pattern Stats: Stevie Jumpsuit
Pattern designer: DoItBetterYourself.club
Pattern level: 4/10
Time start to finish: 3.0 hours
Suggested fabrics: knits with 50% 4-way stretch and great recovery, bamboo lycra, DBP
My fabrics: floral is DBP, solid is cotton bamboo
Options: short, culottes, wide leg or tapered leg, optional front tie, optional pockets
Price: On sale for $8.39 through July 12, 2019 then $13.99

Ever try on a romper or jumpsuit at Target because it looked so cute only to find it so tight? No just me? I've found through sewing that the reason that happens for me is that I have a longer trunk length than what's average for my overall clothing size. That's exactly why custom made clothing works for me!
The Stevie is the newest pattern from DIBY that I was able to test. I was excited for this test as I have a jumpsuit on my #makenine2019 challenge. I'm going to replace the one I was planning on making with this one. I have more details about that at the end of this post.
Let's talk about the Stevie. The Stevie has 4 different leg options. The wide shorts, culottes, wide long or tapered elastic long legs. You also have the option to add in slat pockets, wide waist ties and take your pick of short flutter or elbow sleeve lengths. There is only one neckline choice which is a v-neck.


I made two different version of Stevie during testing. I started out with a short length, short sleeve with waist tie version in DBP from Knitpop. I originally chose these options because they used the least fabric. I was uncertain if the trunk adjustments I was going to make would work out correctly so didn't want to use larger amounts of yardage just yet.
Adjustments

As with all DIBY patterns, they have a thorough instruction booklet for getting the optimal fit. I would highly recommend just following the guide to make the appropriate adjustments.
First, grade.
Next, complete your FBA (if needed)
Then, adjust for height. This includes trunk adjustments and altering the bodice or inseam lengths.
I needed to complete all of these steps. If you are needing to complete an FBA do not grade out for your full bust measurement, follow the upper bust measurement for the entire bust. I graded from a size 6 bust to a 10 waist, 8 high hip, 10 full hip, 12 thigh and measured a size 16 for calves. During testing we realized there was enough ease to not need to grade out for the calves.
For this type of pattern work, I find having Swedish tracing paper on hand is helpful. I also use my acrylic ruler for measurements now too. Most standard measuring tapes are 60" long so you'll need a longer one for measuring your trunk length. I have a special measuring tape for inseam and crotch measurements but found other options that are long enough on Amazon.

Then I completed my FBA. During that process, I wrote down all of my measurements and calculations on my pattern piece. I find this the most convenient for if I need to reference them again, I know exactly where they are. I needed to reference my "drop adjustment" for calculating my trunk adjustment next.
Now my trunk length was why I've never been able to wear rompers or jumpsuits before. I found when making my first one piece, the Amelia, that I have a long trunk length. It is actually 4.75" longer than my average size 8. When I calculated my trunk adjustment amount, I removed the drop adjustment and then divided by 2 (for front and back adjustment) to decide on needing a 2.25" total adjustment. The tutorial recommends adding or removing the trunk adjustment to both the bodice and the crotch. I know that I have a standard 8" side waist length so was reluctant to add to the bodice. I ended up only adding 0.50" to the bodice and the remaining 1.75" to the crotch.
If you are adjusting for your trunk length, make sure to adjust the inseam as well. I missed this and had to make adjustments later which wasn't very easy to do.
Construction


The construction on the Stevie differs deepening on if you are or aren't adding the front waist ties. Make sure to make that decision by this point. Follow the appropriate directions for which option you chose.

You be needing elastic finishings of different sizes for the construction. The 1/4" clear elastic is for reinforcing the neckline since that's how you get it on/off. The 1/2" knit elastic is for the waist. Both of those elastics are not optional and are critical in construction. If you are making the tapered leg version you will also need 1" elastic.
Follow the steps in the tutorial to construct your jumpsuit. After all of the adjustments, I thought the sewing portion was extremely fast!
Fit

The floral DBP short jumpsuit was my first version. After this, there were adjustments made to the pattern to change the ease throughout, the crotch drop and the drape of the flutter sleeve. You can see the difference in fit with my second make. I wasn't in complete love with the fit of this one at first but I've grown to really like it. The floral print makes it very forgiving for fit and DBP hides any imperfections.
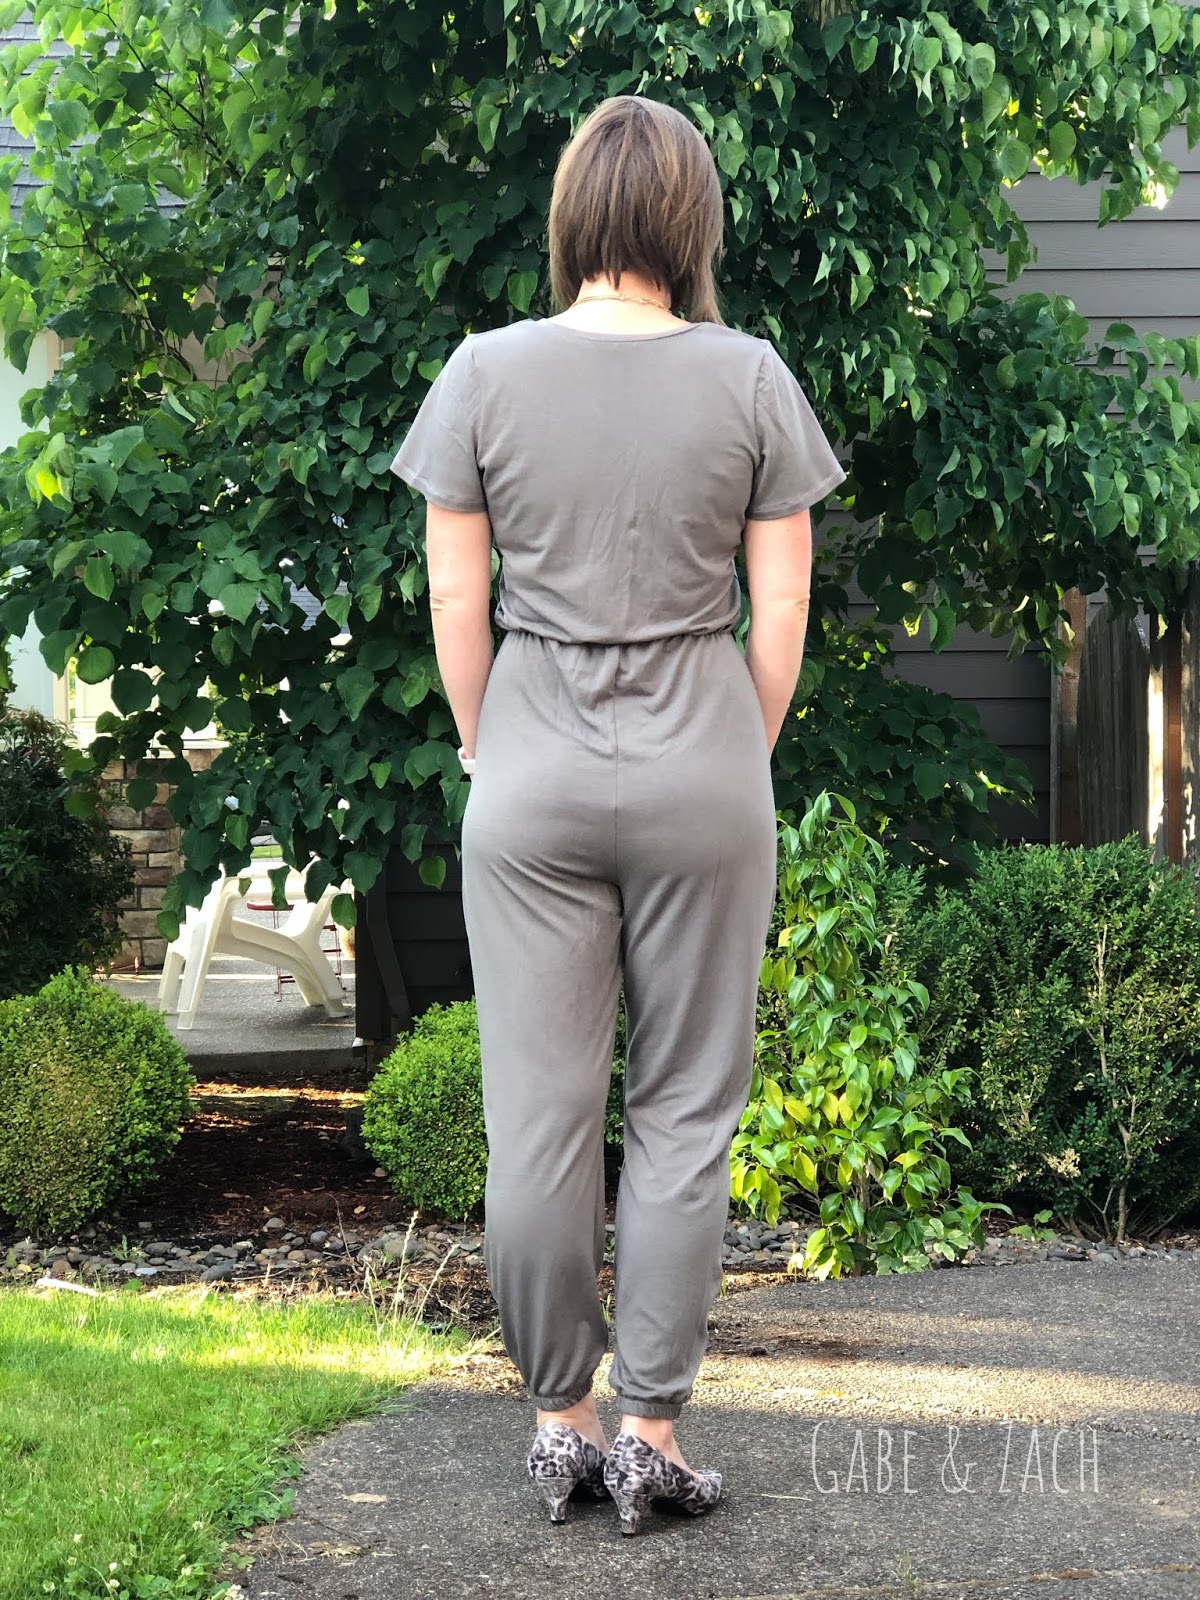

My second make was the tapered long leg with elastic. It's made in a cotton bamboo lycra I purchased on clearance from Knitpop last year. I like the feel of this but found it a bit more boring than I'm used to. Also, I think I could have done with about 0.25-0.50" extra ease in the crotch to change the fit of the rear. This one I graded out for my calves on since it was a fitted leg but shouldn't have. It required quite a few adjustments to get it slimmer.
The Stevie is on sale for 40% off through July 12th, 2019. No code is needed at checkout. The regular price of this pattern is $13.99.
#MakeNine2019 Update
I've decided that rather than making the Made for Mermaids Megan wide leg romper, I will be using this as a replacment. My goal was to make a long romper and I have accomplished that. As I've thought about it, I'm not sure that I see the use of long pant jumpsuits in my everyday life. I really love them as short rompers though.

My posts may feature affiliate links. This means if you make a purchase from these links, I receive a small percentage in compensation at no cost to you. I may have received patterns or products to test or review but the opinions I voice are my own.


Comments
Post a Comment