Lily Hack Series: V-Neck
Lily Hack Series: V-Neck

I love when a pattern can be a base for so many other ideas! So far in the Lily Hack Series I've shown how to add a ruffle or create tie shoulder straps. Today, we'll talk about modifying the neckline to make it a v-neck.
As mentioned in my other Lily hacks, the Sinclair Lily is a pattern that was released in 2017. Patterns released recently from Sinclair Patterns have had an updated format that the Lily does not have at this time. What that means is that the Lily doesn't have the nested sizes where you can "select" which sizes you need to print or the cup sizes like the recently released Daisy. That being said, the two sizes smaller and larger are faintly printed on the size you print. I printed the size 6 based on my bust size which means the size 2, 4, 8 and 10 printed faintly automatically to allow to grade.
Pattern Hack Prep
To start, make sure you have your Lily printed. Make adjustments and complete any grading needed then cut it out.The only pattern piece you will need to change for this hack is the front pattern piece. I tried to base this off of another v-neck woven camisole I had but ended up lowering it too much. We will be using the "Classic" neckline and measuring down 1.25" and adding a mark. (My photo shows 2" which was way too much.)

Take your French curve ruler and line it up with the mark and the strap side at the top. Draw the new cut line.
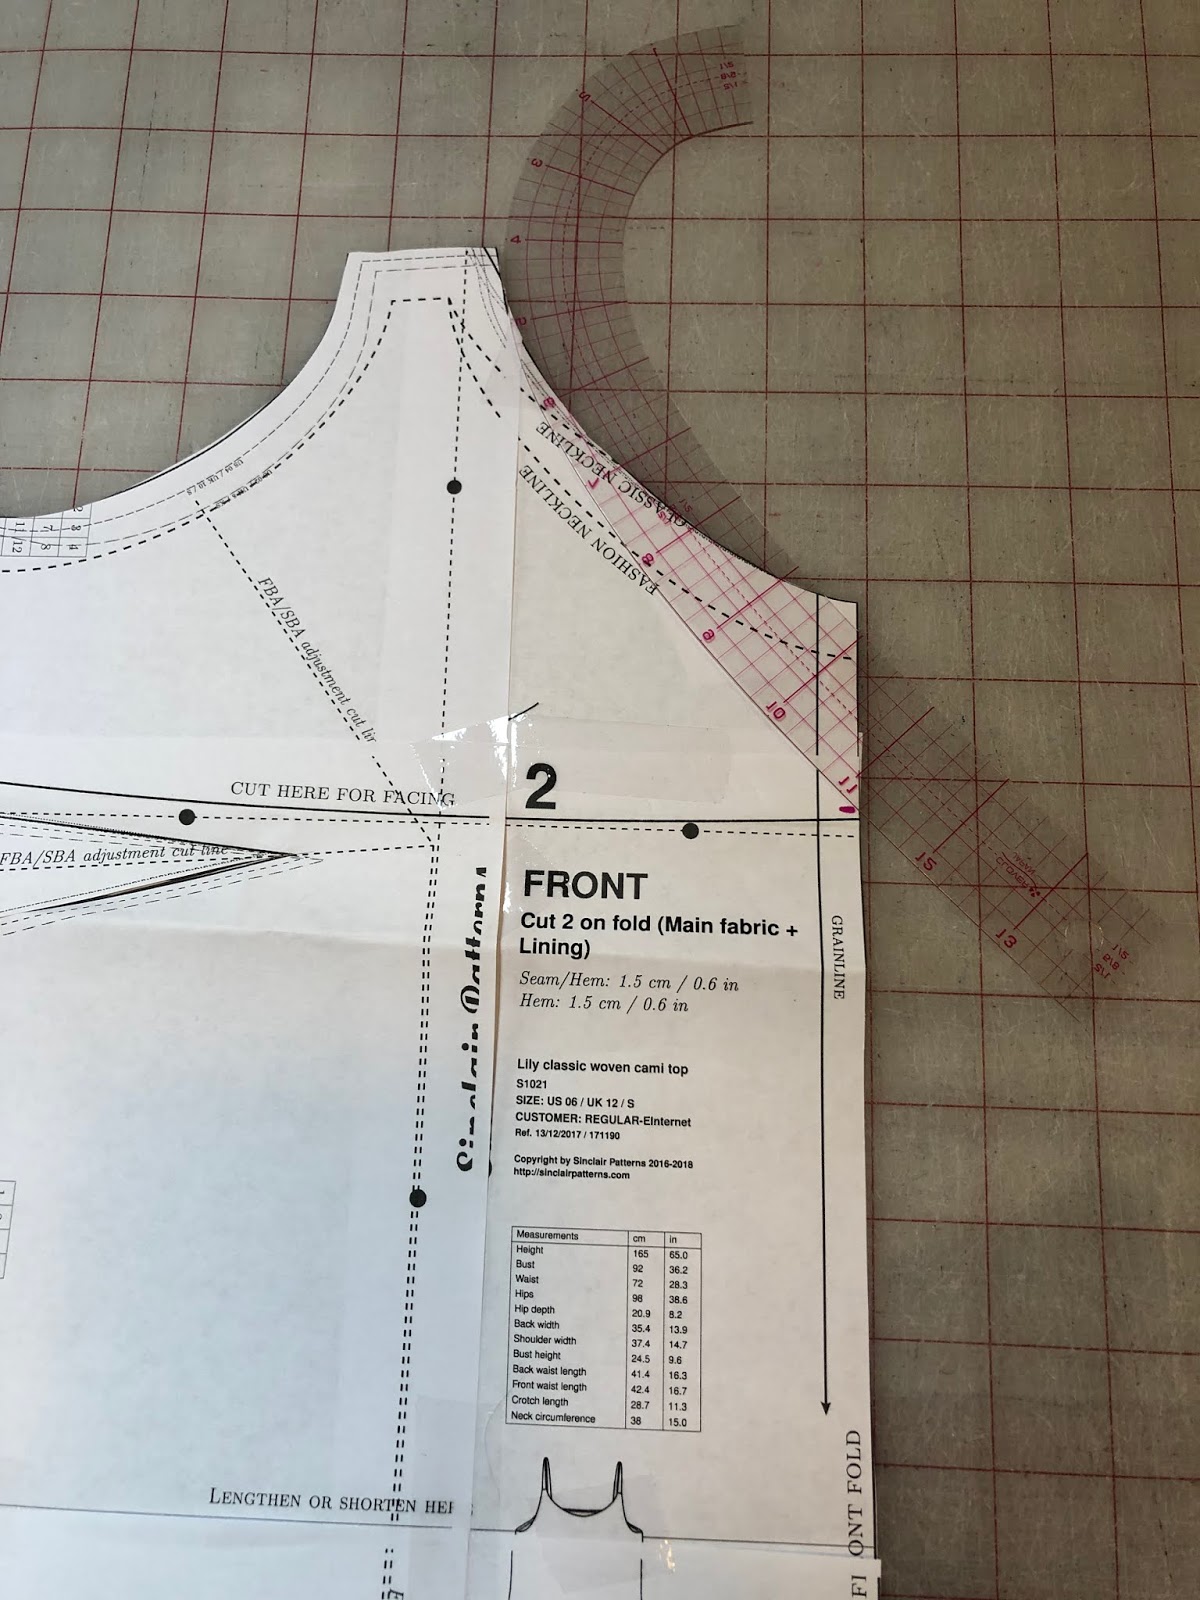
Cut your front piece on the fold using the new cut line.

Cut the remaining pieces including either a facing or lining on the new v-neck cutline as well. Since I was using eyelet fabric for this top, I chose to do a full lining in black rayon challis. I used that same rayon challis fabric for my straps.

Construction
All of the steps for the V-neck version are exactly the same. Make sure when you get to the V you stop with your needle down, pick up your presser foot and turn to maintain the sharp V. After you've stitched the neckline, clip into the V up to but not through the stitching.
I prefer to use pinking sheers to clip down the seam allowance to 1/8"-1/4".


After you've checked the strap length, understitch. Understitching gets a clean look and prevents the lining from flipping up. Press after to get a crisp look.

Finish constructing the cami by sewing up the side seams and hemming. I chose to cut the lining layer 1.5" shorter and use my serger finish for a rolled hem finish.

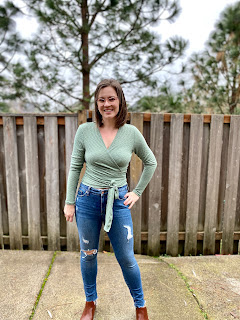
Now you are done! Congratulations on making a v-neck woven cami! Lily provides so many possibilities and is a wonderful base pattern.
Fabric

The fabric I used for this V-neck version is the mocha eyelet from Mily Mae Fabrics. I love an eyelet look but find it often difficult to use. Since the Lily has a full lining option, this was an easy solution to maintaining coverage and not showing skin through the eyelets.
My posts may feature affiliate links. This means if you make a purchase from these links, I receive a small percentage in compensation at no cost to you. I may have received patterns or products to test or review but the opinions I voice are my own.

Comments
Post a Comment