Mya Gathered Back Hack

I decided I could make it myself with a pattern that I know will last us for years to come, Made for Mermaids Mya. I've made the Women's Mya for myself in various fabrics and cut options but took opportunity of a recent sale to grab the Mya for girls too. They've recently updated this pattern to offer sleeveless and racerback options so it was a great base to work from.
Preparing your Pattern Pieces
My first step was to prepare the pattern based on my nieces measurements. She's grown significantly since last fall and now fits into a size 10 for her chest, waist and hips then a 12 for her height. I followed the directions on the pattern for adjusting for height and traced it onto my favorite tracing medium, Pellon 830.Going forward, all of the hack instructions only apply to the back piece. For this hack, you do not need to modify the front piece or bands at all. Next, I decided where I wanted my cut line on the racerback to be. I chose for it to be 3.5" from the neck. Draw a horizontal line there. Then measure both above and below that line 0.5" to account for the seam allowances and draw horizontal lines there. My ending cut line is notated in pink below with the seam allowance for the bottom in blue and top in yellow.
 |
| The pink line marks the 3.5" from the neckline. The blue line and yellow line are each 0.5" above/below the marked line. |
Next, we will focus on the bottom portion of the back piece. Take the back pattern piece and place it on a piece of blank paper. Trace around the racerback armsyce and follow the top line (notated in blue above).

Move the back pattern piece to the side. From the horizontal line, mark 1.5" to the right. Do the same from the bottom of the armsyce curve. This will allow the extra fabric to be gathered later on but also keep the armsyce the same.

Now bring back the back pattern piece. Place it so both of the markings intersect the pattern piece. Draw along the new armsyce location.

When you remove the original back pattern your pattern piece should now look like this. Cut along the outer most lines.


To create the upper portion for this hack, trace the upper racerback from the original pattern but trace down to the bottom line we drew earlier (notated in yellow above). Cut one of this piece, on the fold.


Constructing the Dress
Take your lower back piece and run basting stitches 1/4 and 5/8 inches along the top straight edge. Start and end about 1" from each side. Basting stitches can be achieved by using the longest straight stitch length on your regular sewing machine. In most cases, this is usually a length of 4-5. You will also want long thread tails so keep that in mind.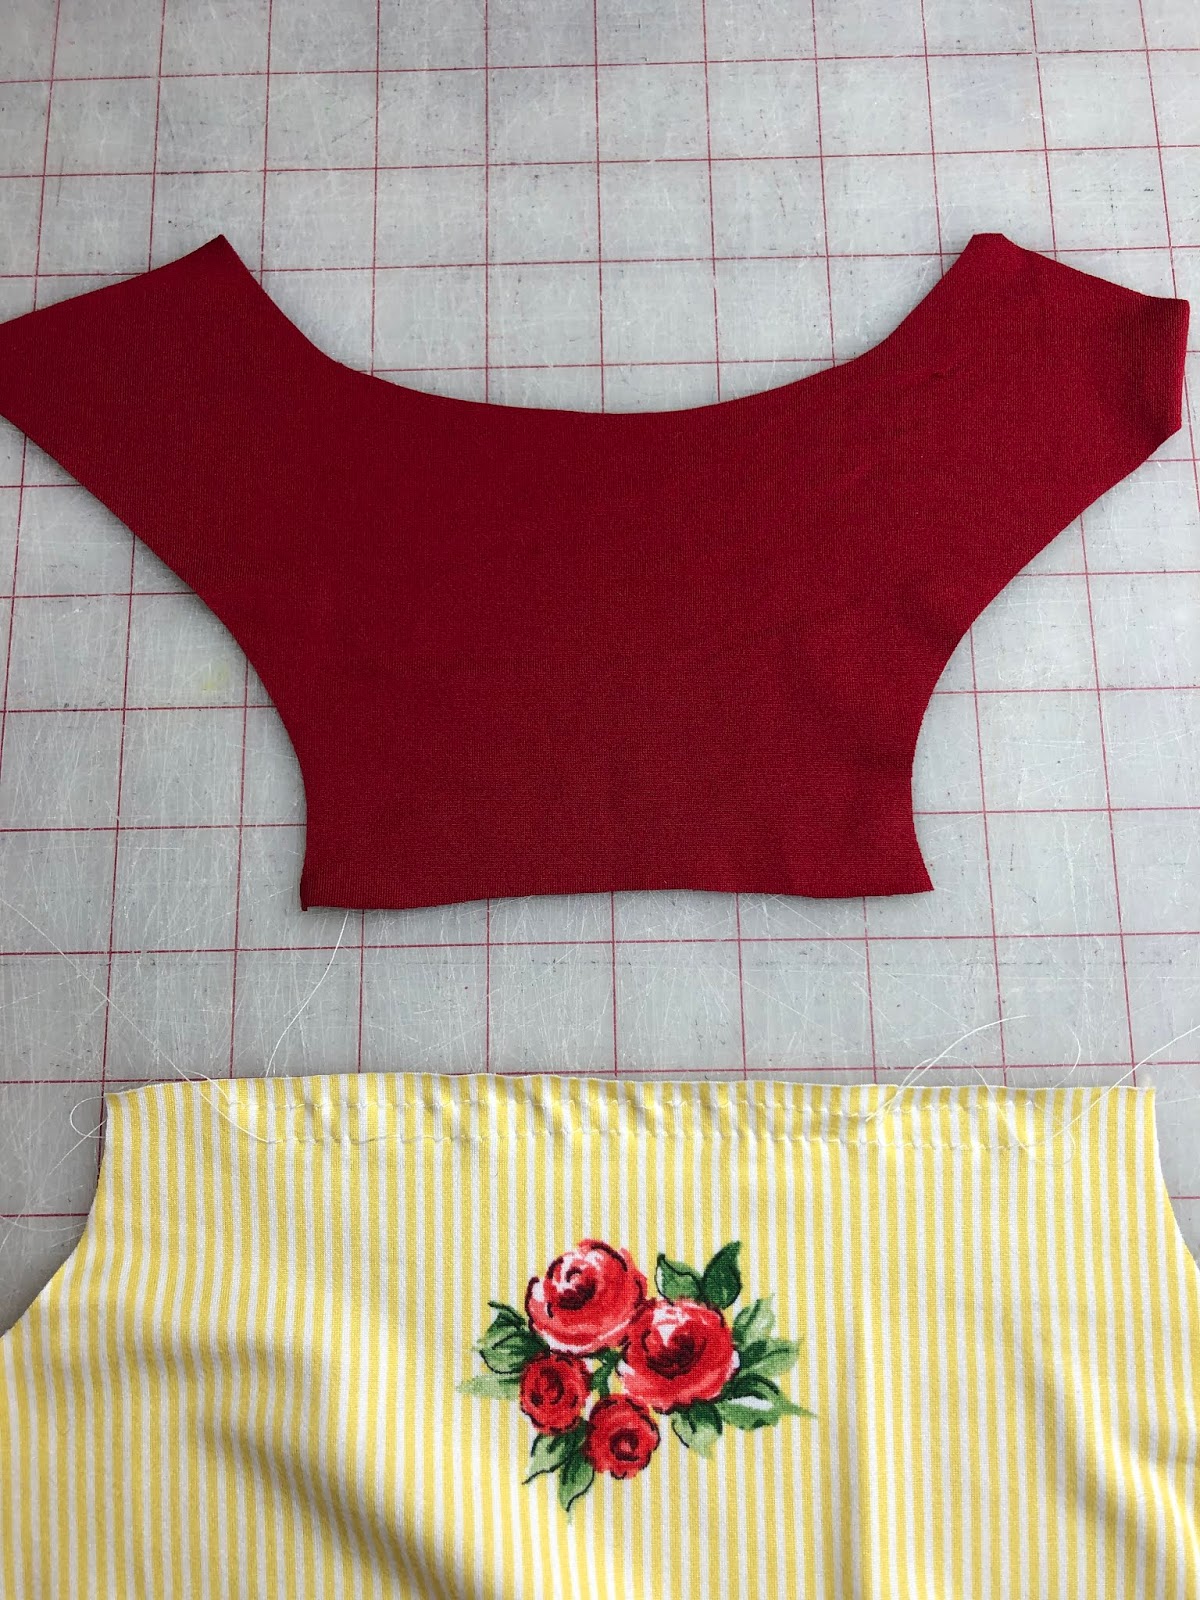 |
| Basting stitches at 1/4" and 5/8" |

Pull both basting stitch threads at the same time to evenly gather the fabric. When the fabric ends up being the same width as the top back piece, even out the stitches and clip. Now with your serger or sewing machine using 0.5" seam allowance, stitch these pieces together. I find it easiest to serge the layers together with the gathers on top. This allows me to see if they aren't even or move at all.


Remove any remaining basting stitches. Continue on assembling the dress as per the instructions treating the back piece you created as one piece now. Sew the shoulder seams and side seams. Attach the neckband and arm bands. Hem. Voila!


The fabrics I used for this are both DBP or double brushed polyester. The process the polyester is brushed makes extremely soft fabric but some people tend to run warm wearing it. I find that it's very wearable even in heat for dresses without sleeves. The yellow vertical stripe floral is the Elizabeth in yellow from Mily Mae Fabrics. This fabric is marked down to under $5/yard right now! I paired it with a bold red that I had in my stash.
I made another for my niece in DBP as well from the Neon Dotty, also from Mily Mae Fabrics. I foresee this being perfect for a coverup for summer. I used a mint DBP for some added contrast to the top back piece on this one.


Although this may seem like a lot of steps, it's actually a very simple hack to do. The gathers at the back and fun pop of contrast are great for making these dresses unique just for my niece.
My posts may feature affiliate links. This means if you make a purchase from these links, I receive a small percentage in compensation at no cost to you. I may have received patterns or products to test or review but the opinions I voice are my own.


Comments
Post a Comment